- TOSIZE.at
- Do it yourself
- DIY Projects
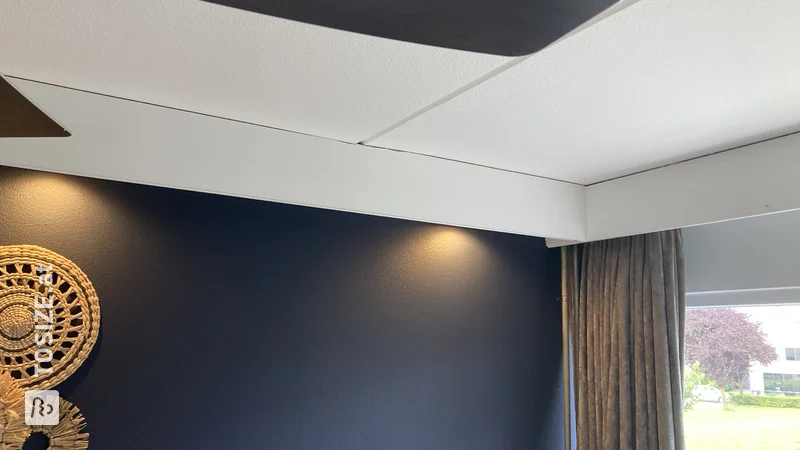
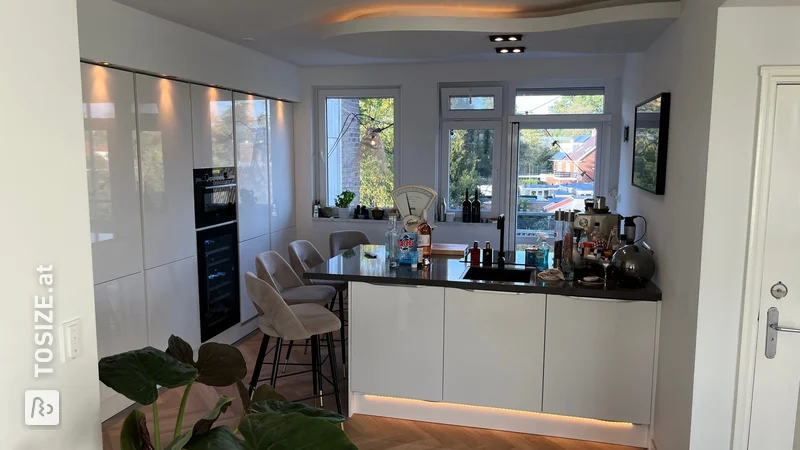
Cove with LED spotlights, by Leon
Cove with LED spotlights, by Leon
Create this project yourself with sheet material cut to size by TOSIZE.at!
Above average
3 minutes
Description
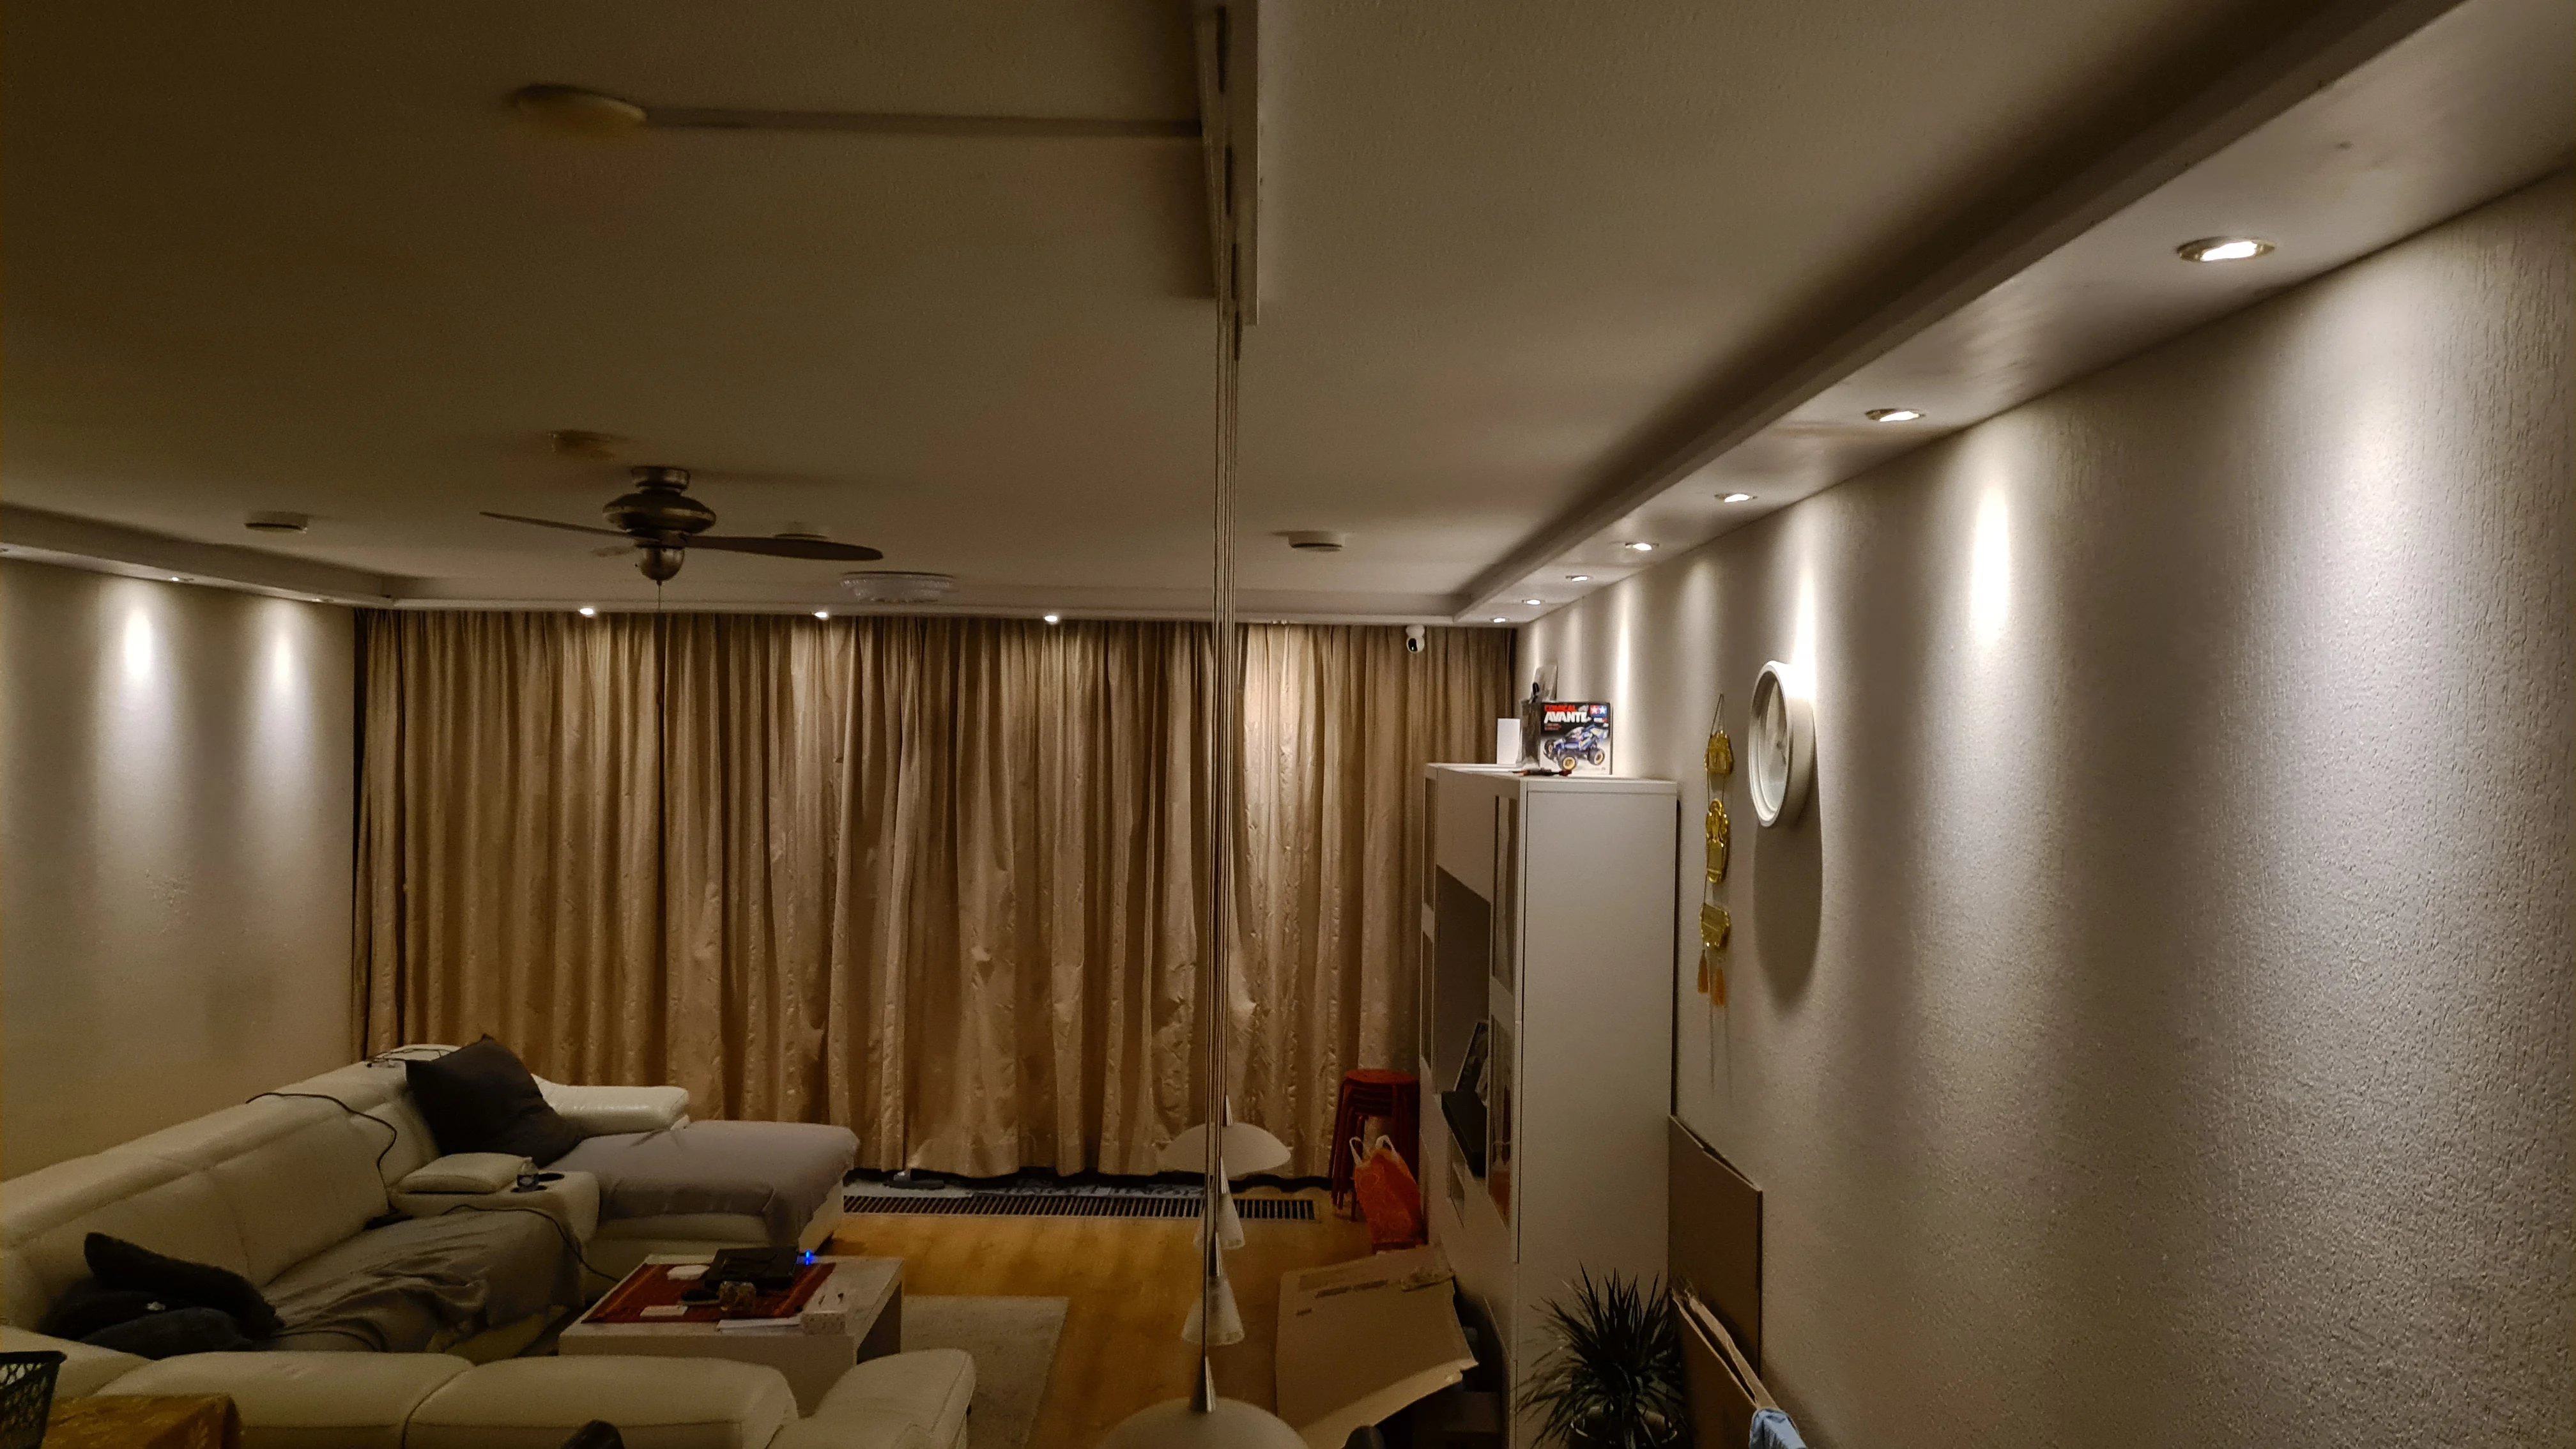
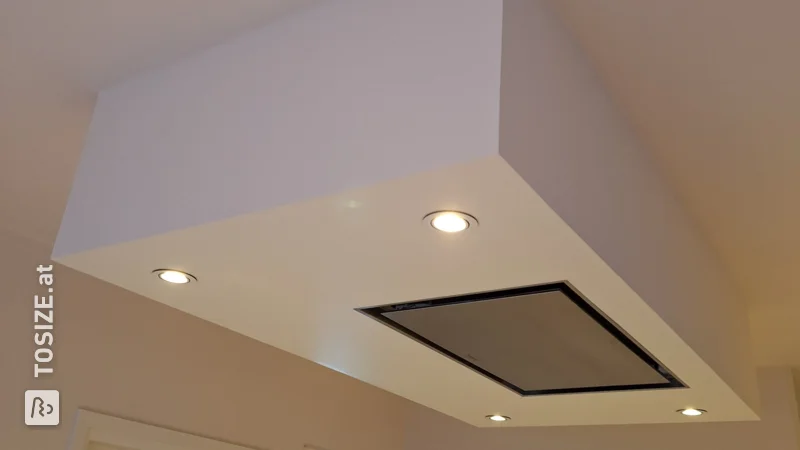
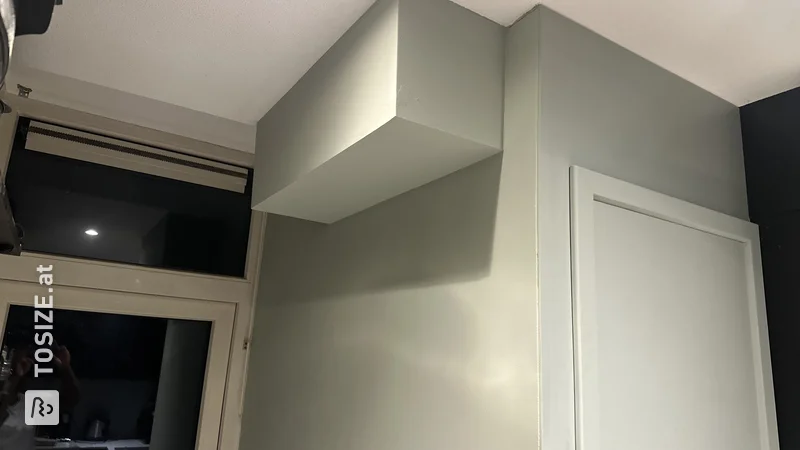
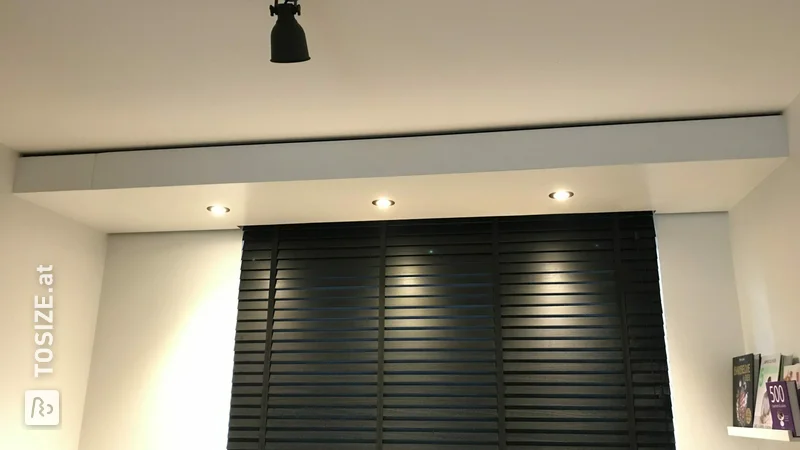
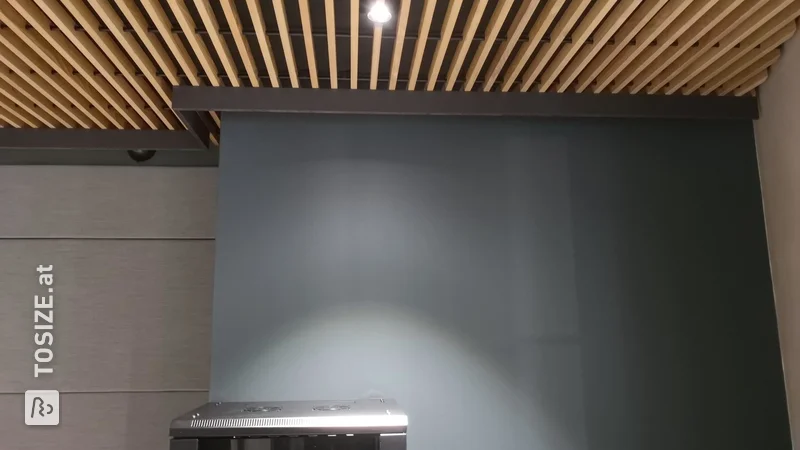
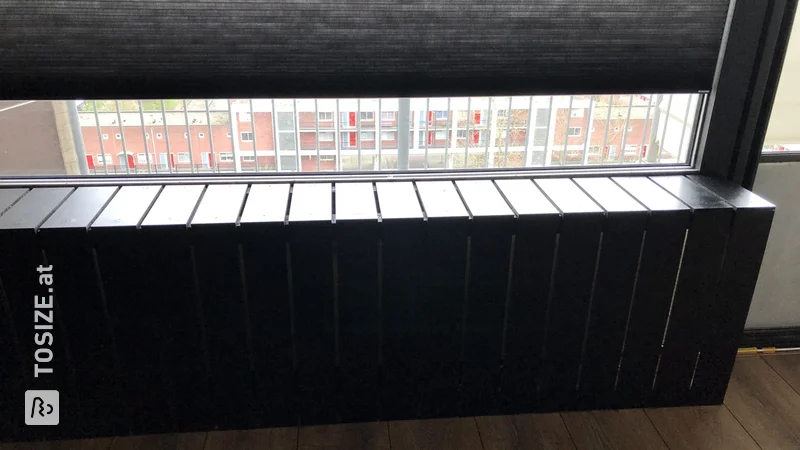
Two coves against the ceiling with wirelessly controlled LED spotlights, plus a slat for the window curtain, which connect the whole thing together so that it is one whole, for the living room.
DIY: Cove with LED lighting
I started by making a 3D drawing in Sketchup. I already had a 3D model of my house. This way I could see how it would fit and look in the room. At first I planned to saw it myself. That's why I drew a cutting drawing based on the dimensions of common MDF panels that you can buy, so that I could saw as efficiently as possible.
Then I came to the TOSIZE.at website, and I saw that you could have it sawn there, and you could fill in the sawing wishes in a detailed and user-friendly way, and that they could also be sawn in miter. Since I don't have a miter saw myself, and due to a lack of sawing experience I would never be able to get it as tight as experts manually, I decided to have it sawn.
The nature of the design offered room for some margins with regard to dimensions / fit between walls etc., which made me dare to take the risk of having it sawn. I ordered primed MDF, which saves on painting.
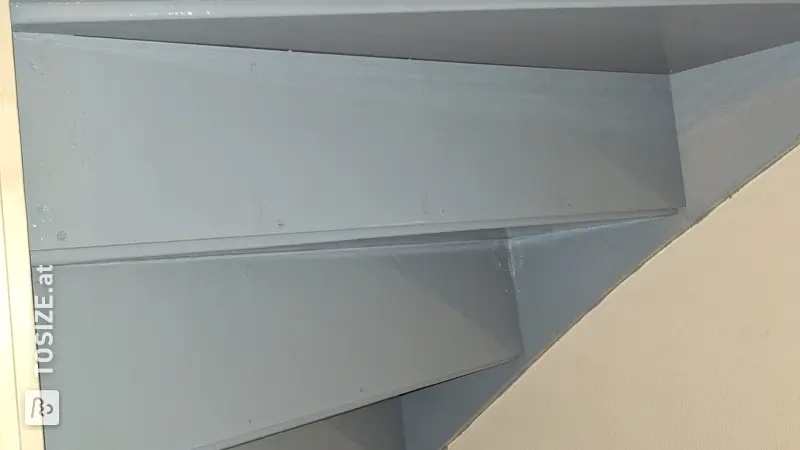
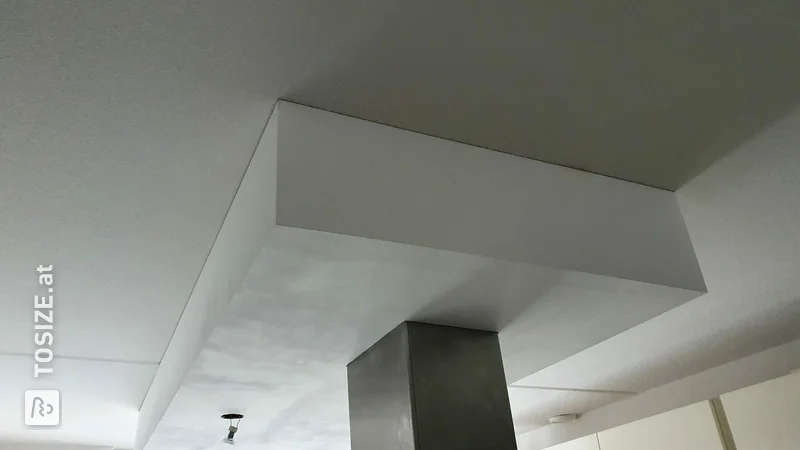
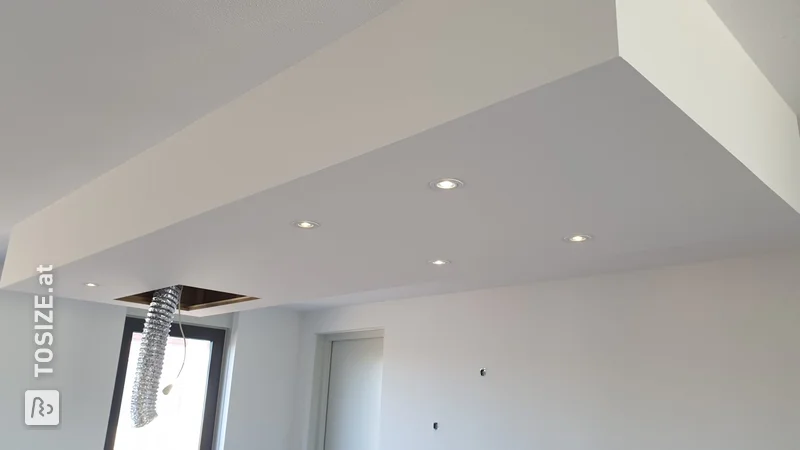
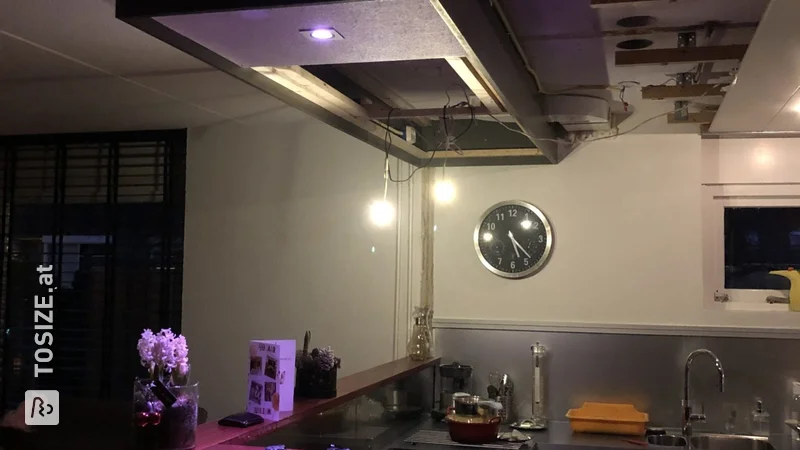
Once the parts arrived, I first sawed the holes for the spotlights and the shelves. Then primed the planks and painted them with latex as I still had them in the color of the walls, which fortunately had recently been painted, so that there would be little color difference between the coves and the walls. I then glued the planks that had been partly mitered together, creating an L-shaped construction. Then, while everything was drying, I placed the pine beams in ceiling and walls. This was the most difficult thing, namely to fix it exactly straight and in the right position, partly because the ceiling and walls are not completely flat/straight. I then prepared the electricity and inserted the wiring and connections for the LED spotlights through the holes in the planks.
I then screwed the planks to the beams.
Then the edges and seams sealed. The wiring is neatly concealed. And everything was painted once again when it was hanging.
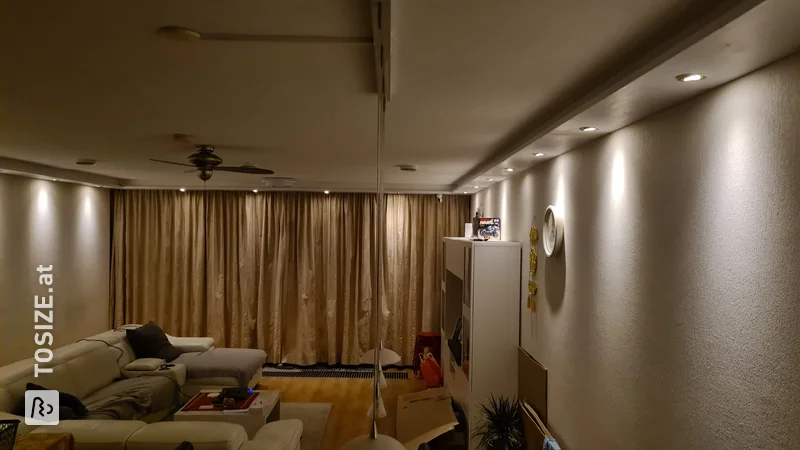
Spots connected and ready!
Custom cove
- Dimensions of left cove (small): 160.0 x 18.0 x 12.0 cm (l x w x h)
- Dimensions right cove (large): 320.0 x 18.0 x 12.0 cm (l x w x h)
- Dimensions of window curtain slat: 360.0 cm
Tip! Also check out our handy DIY tips!
What now?
This is a project for inspiration. Because our assortment has changed, (some of) the products are no longer available.
View all sheet materials